Planograms can be used at many levels, from planning a single shelf to redesigning an entire store layout. Understanding how to apply the right level of detail helps retailers approach remerchandising with greater clarity and control.
Any retailer will know that remerchandising a shop is essential for making sure customers are more likely to find what they need - and sometimes what they don’t think they need!
When rearranging a shop, planograms become an essential part of this process; taking in analysis, product mix, new vs. old stock, customer behaviour and more to help you get every bit of efficiency possible out of your best sales tool – your shop’s layout.
If you need to start from the ground up and want to learn about what a planogram is and how they can help you as a high street retail business, then you can read our introduction to planograms here.
In this article we’ll look at the different levels of planogram you can utilise when planning your shop’s layout, from granular to macro-level, as well as a step-by-step guide on how to build an effective planogram. You’ll also be able to see examples of what this can look like from a more rudimentary (but effective) top-level planogram to what a shelf-level planagram can look like.
Approaches to creating a planogram
There is no single “correct” level of detail when creating a planogram; the most effective approach depends on the size of your store, the breadth and complexity of your range, and the scale of the change you are planning. In many cases, retailers will use more than one type of planogram at the same time, combining detailed shelf-level plans with higher-level layout views to ensure both commercial and practical considerations are covered.
Shelf-level (granular) planagrams
Shelf-level planograms focus on individual bays, shelves, or pegboards and are the most detailed form of planning. They are particularly useful in areas of the store where space directly impacts sales performance, such as high-volume or high-margin categories, chilled and impulse fixtures, or promotional displays that change frequently.
At this level, the planogram defines exactly where each product sits, how many facings it receives, and how shelves are spaced vertically. This level of detail helps ensure consistency across the store, makes replenishment easier for staff, and reduces the risk of overfilling or underutilising shelves. Shelf-level planograms are especially valuable when ranges change often or when maintaining a strong visual standard is critical.
Category or zone-based planograms
Category or zone-based planagrams take a step back from individual products and instead focus on allocating space to broader categories or missions within the store. Rather than showing every product line, they define blocks of space for categories. For example, a DIY store may look at a paint and decorating zone individually, not going deeper into each brand but still seeing how sub-categories of products fit within this block.
This approach works well for mid-sized stores, seasonal remerchandising projects, or shops with mixed missions, such as convenience retailers that also offer food-to-go. These planograms help retailers consider category adjacencies, identify hot spots and power aisles, and clearly define promotional or seasonal zones. They are particularly useful when assessing whether space is being allocated in line with customer behaviour and sales performance.
Whole-store, top-down floor plans
Whole-store, top-down planograms provide a high-level view of the entire shop layout and are typically used for major remerchandising projects or when planning a new store. These plans show how all departments and services fit together, including entrances and exits, till points, and back-of-house areas.
This type of planogram is essential when making significant layout changes, as it allows retailers to think about customer flow, sight lines, and navigation before committing to fixture moves or refits. While less detailed at a product level, whole-store plans provide the structural framework that more detailed category and shelf-level planograms can sit within.
In practice, the most effective planogram projects combine elements of all three approaches, using top-down layouts to define structure, zone-based plans to allocate space, and shelf-level planograms to optimise performance in key areas.
💡 TOP TIP: It's easy to overthink planograms, but you don't need any fancy software or equipment to create one. A simple spreadsheet that uses cells to a rough scale of your shop will do the job well, and can make it far easier to get started on making a planogram!

Step 1: Define your objective
Start by creating a clear aim, for example:
- Increase sales in a specific category
- Improve navigation and reduce customer confusion
- Introduce a new range
- Improve operational efficiency
A planogram works best when serving a clear purpose as opposed to simply rearranging fixtures.
Step 2: Understand your space
Measure accurately and note:
- Total floor space
- Fixture sizes
- Power points, pillars, and obstructions
- Customer entry and exit points
An accurate base plan is hugely helpful for any merchandising decisions that need to be made.
Step 3: Review your sales and stock data
Use available data to guide space allocation:
- Sales by category
- Margin contribution
- Rate of sale
- Seasonality
A guiding principle can be that space should be earned, not assumed.
Step 4: Map customer flow
Consider how customers naturally move through your store:
- First point of impact
- Natural walking routes
- Dwell zones
- Bottlenecks
For example, high-margin and impulse categories often perform better in high-visibility areas.
Step 5: Allocate space by priority
Decide how much space each category or range should receive based on:
- Sales performance
- Strategic importance
- Customer mission
Avoid overloading slow-moving categories.
Step 6: Add detail where needed
For key areas, move from zones to shelf-level detail:
- Product order
- Facings
- Promotional placements
Consistency is key for ease of replenishment and can have an added benefit of helping your staff be more efficient.
Step 7: Test, implement, and review
Once implemented:
- Monitor sales and customer behaviour
- Gather staff feedback
- Adjust the planagram as required
A planogram should evolve, not remain static.
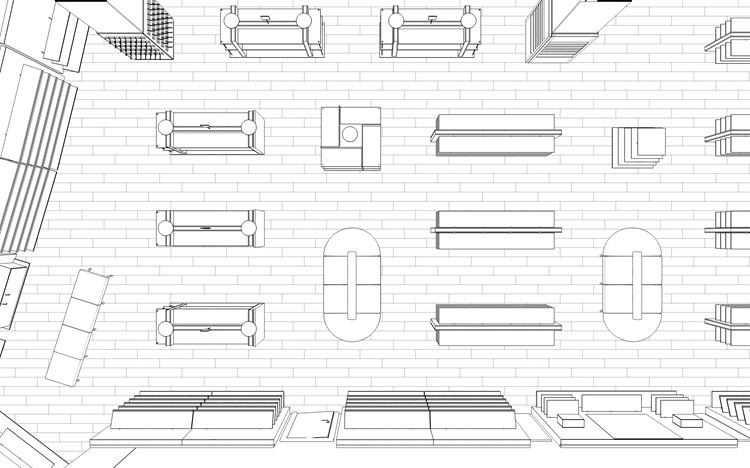
Visual planogram examples
Already a member?
Login'Planning your planograms' makes all the difference
Planograms can be taken beyond basic layouts and used as a practical tool for planning remerchandising at different levels, from a single shelf to a full store layout, and by understanding when and how to implement them retailers can approach changes with greater clarity and purpose.
Whether planning a small adjustment or a wider layout change, using planagrams to think through space, range, and flow in advance helps ensure decisions are deliberate and aligned with the needs of the store.
Shop fitting service - part of your Bira member benefits
Once you've decided on a new layout for your shop, or created your very first layout, as a Bira member you have access to Salepoint's shop fitting service to help make your vision a reality. Click the link below to find out more.

What are your planogram success stories?
You can help make this resource even more valuable to other independent retailers by sharing your hands-on experience with creating planograms and the impact it's made in your shop. Start the conversation with your fellow retailers on Bira Connect.
Image credit: vadim_fl/stock.adobe.com; Syda Productions/stock.adobe.com;
Related Resources
-
Sales & Marketing Hub
Whether you're a seasoned marketer, a sales enthusiast, or want to explore more ways to grow business, this hub is designed to be your one-stop destination for retail-focused sales and marketing.
-
Make the most of Easter – 5 simple tips for independent retailers to grow sales
Five practical tips to help independent retailers maximise Easter sales, from spring window displays to promoting products for gatherings.